By Bruce Petty
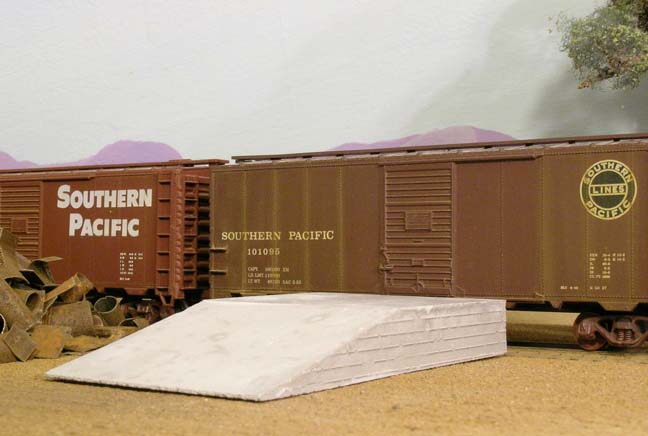
Nowadays we have highly detailed HO model freight cars being released monthly. They have separate grab irons, thin metal see-through roof walks, better detailed trucks and Kadee style couplers. Nice looking cars, but each car can cost $25.00 or more. So a 20 car freight can cost $500.00 at a minimum!
I only have a few of these highly detailed cars and think this is a lot of cash to spend on little HO plastic train cars. But, I also have many older model freight cars, some of them for 40 years when I first got into the model railroad hobby. I’m sentimental about my old freight car fleet and I didn’t want to toss them out. So it it was time to do some upgrading of the not state-of-the-art models like, AHM, Mantua and Tyco to name a few. I had all the upgrading parts needed stashed in parts boxes, so this project cost nothing.
Only several hours of fun is involved.
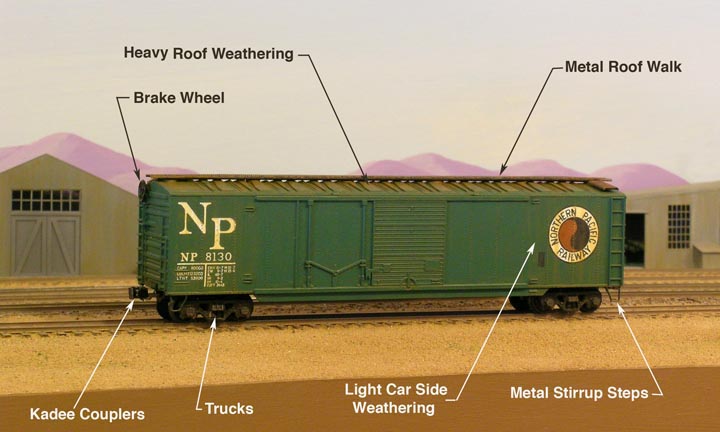
This 1970s, AHM, 50 foot, Northern Pacific freight car will be used for this detailing demonstration. The company did a nice three color lettering job at a time when other manufacturing companies just didn’t. I don’t know how close this NP model is to the prototype car, having little knowledge about NP freight cars is probably good in this case. However I like the NP emblem and its green color, and it makes a great lumber car for shipping to the lumber yard industry.
First, the pressed in roof walk had to go, it was too thick and not in scale. On the AHM type model, the car body came off the frame by slightly pushing in of the car ends. The roof holes have a in molded ring around them, these needed to be filled down to roof level.
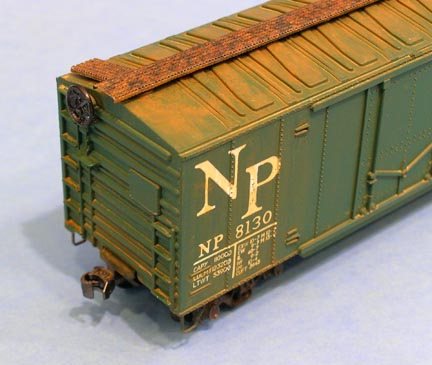
The replacement metal roof walk is made out out of a discarded TV item. I just didn’t want to spend over seven dollars per etched metal roof walk that isn’t in a model contest and I’d hardly ever notice.
A better trucks are a must. Most of these type of cheeper cars came in train sets that had the coupler mounted to the trucks to go around sharp curves. Use a wide Xacto blade to twist between the truck and frame to lift the plastic pin and remove the truck. Then glue the pin back in the hole using a liquid cement. After curing, cut off the truck holding part of the pin flush at the frame using an Xacto saw and file flat the truck mount pin.
I used a #50 drill in the center of each glued in pin and used self-tapping 2-56 screw for the new truck.
I prefer using the older metal, Central Valley Co. or Athearn “SPRUNG” trucks, just use today’s metal wheel sets with Athearn’s.
With the trucks secured I could then measure for the #21 Kadee coupler box. This offset coupler clears the frame and body plastic snap lock assembly. All I needed was a spacer, so I cut the tube and lip off of one of the Kadee boxes thin cover piece, and emery papered it smooth. (Over the years I’ve collected a lot of these Kadee coupler pieces to make shims from.)
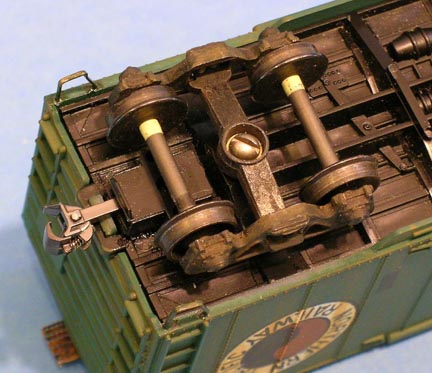
Use liquid cement to glue the spacer to the car frame and then the coupler box assembly. You can use screws to mount the assembly but if the coupler ever needs repair, I find it much easier to slice off the old coupler box and start over. Any final adjustments can be done by adding Kadee fiber washers to the trucks.
The cast on stirrup steps were cutoff and metal manufactured ones replaced. Carefully drill holes to except the wire stirrups with a hand drill.
I also found a better looking Break Wheel in my spare parts box. I painted it with Floquil primer. Prototype replacement parts are usually painted in oxide, gray primer or black.
Now comes time to weather the car. I use flat brown Latex indoor house paint. Just find something to paint brown around the house and you’ll also have a lifetime supply of weathering paint. I mix a cap full of 70% alcohol in a small dish of water, this helps the Latex wash adhere to the car body.
I blotted the roof with Latex brown so it would look rusted, then mixed a wash of color so it can be put on with a large so it can be put on with a large soft brush. Lighter washes were applied on the roof and over the sides to blend in with the green for weathering. This is part of a project that can be done outdoors on a warm dry weathering a fleet of cars. Use a soft brush and wash over the entire car and let dry while working on others. Add more wash and use a finer brush to make streaks down the car sides.
My refinished old fleet of cars can now blend in with the newer finely detailed cars on the layout without notice.

NOTE: This is a second AHM car just like the Northern Pacific one. Notice how much thicker the roofwalk is and stirrup steps are. The next car I need to rebuild and weather up as a biohazard.
