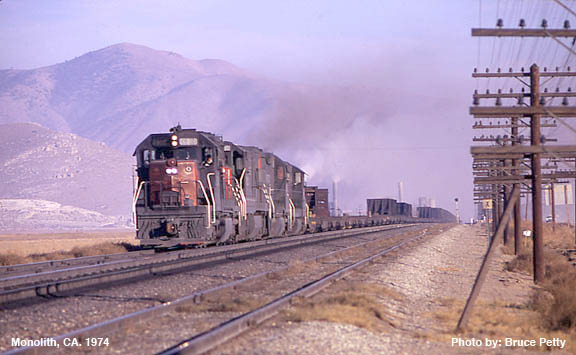
By Bruce Petty
One of my favorite types of Southern Pacific freight trains was the Make-Up-Eugene (MUG) flat car train that ran from Los Angeles, Taylor yard north into Oregon, returning empty flat cars to lumber mills for reloading. I’ve seen this train with what seemed like a hundred flat cars snaking their way over the Tehachapi Mountains.

Modified Tyco 50 foot flat car.
You may have noticed that there are not many styles of HO Scale, 40 and 50 foot flat cars on the market, other than the same old two that Athearn has made for years. More recently, Intermountain makes an assembled 50 foot flat car for about $40.00 each, that means a 30 car MUG train would cost $1200.00 dollars. That is not in my railroad budget!
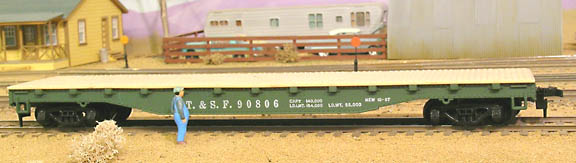
Tyco flat car out of the box.
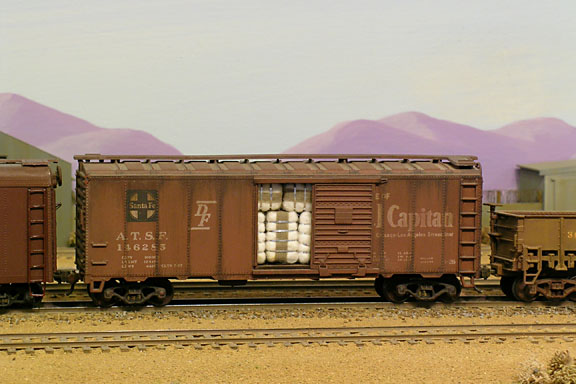
Don’t laugh to hard, but what may look to be a junkie toy model, on closer inspection is really a high end design and die work done by a professionals with a model railroading background. With a little detail work, these cars can match todays high end models.
Years ago I began collecting these TYCO flat cars from train shows for a dollar each, they were cheep because no one at the time wanted them. Look closely at the frame casting and notice how well detailed the rivet and stake pockets are and they have a removable deck.
These cars are somewhat close to a prototype SP 50 foot flat car, the prototype has a few more stake pockets than the TYCO model. But this is close enough for me, a 30 car flat car train has only cost me $30.00 to acquire the cars.
Now for the detailing part of the project. For the experienced modeler, the conversion is a simple one evening project, however the novice may need a second evening.
This is how I rebuild TYCO flat cars. I won’t list every little detail to be done because some of this modeling work is just common sense.
First: Remove the snap-on deck from the body by using a small screwdriver pushing the decks 10 tabs inward to the center of the cars underside.
Second: Remove the trucks from the car body by squeezing the center pin taps together.

FRAME DETAILING
Remove the plastic stirrup steps on the car body filing them flush with the frame. Drill holes to accept the metal Details West flat wire stirrup in four places.
Cut off the eight plastic handrails and drill holes to accept the metal wire handrails.
Plug the large hole where the trucks were mounted by using a round piece of spru stock from a structure kit being a bit larger than the car diameter hole. Emery paper the spru down to a snug fit and cement in place with Tenax 7R solvent, then set aside to cure. File the spru flat down to match the height of the frame hole, then drill and tap for a truck mounting screw.
At this time I make up a Kadee coupler within its plastic box cemented together and then cement it under the car body. You could use screws instead but I have yet needed to replace a coupler box.
I soldered a Cal-Scale brake wheel on to a short length of .030 brass wire and mounted it on the car “B” end.
WOODEN DECK
Take a flat file and remove the edge plastic along the decks edge so the stake pocket holes are open. Then with an Xacto knife, cut matching lines along the edge to match the width of the deck timbers. Emery paper the top of the deck with the direction of the wood grain to make flush the rivets.
PAINT & DECAL
I airbrushed Scalecoat’s Box Car Red color on all car frames I had detailed. The decks were painted and weathered with dirty brown colors. Decal them for SP or for what ever your favorite railroad is. I used some some old Champ decals that a hobby shop still had in stock.
TRUCKS

I use metal sprung trucks with new wheel sets for almost all my rolling stock on my layout. Mainly because cars having sprung trucks won’t roll off on their own when set out on a spur track and I like the mechanical look to the springs.

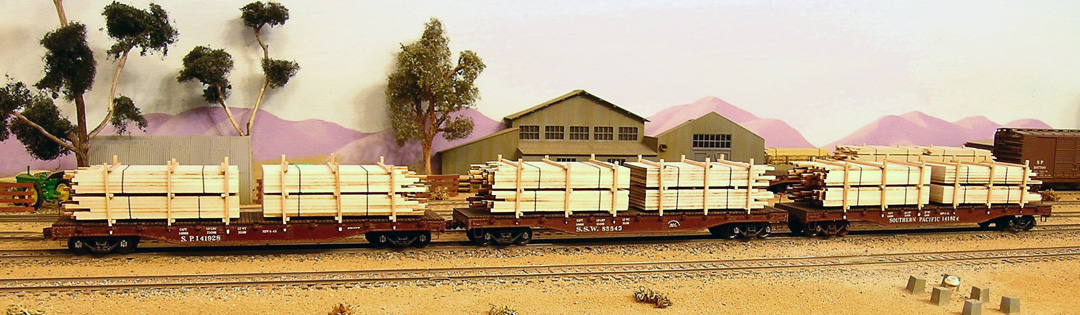
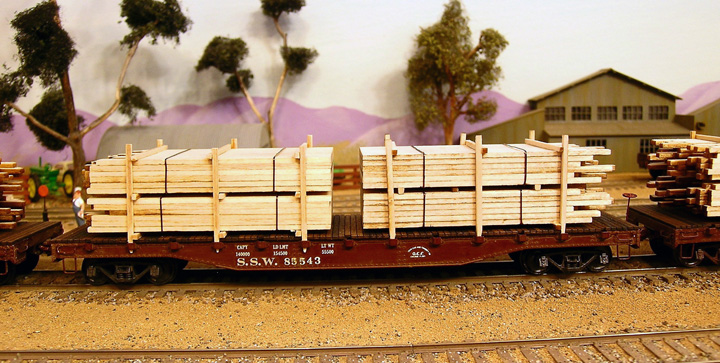
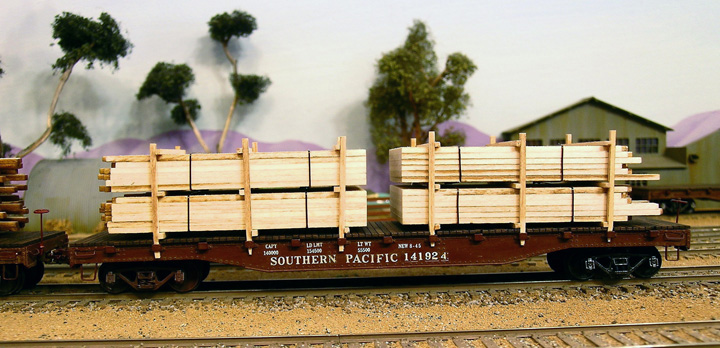
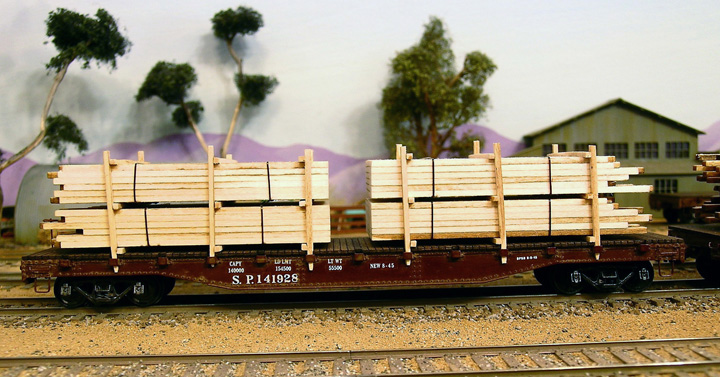
These three finished flat cars have lumber loads were built up with laser cut wood. Photos shown below are close up views of Lumber loaded cars. The loads are easily removable.
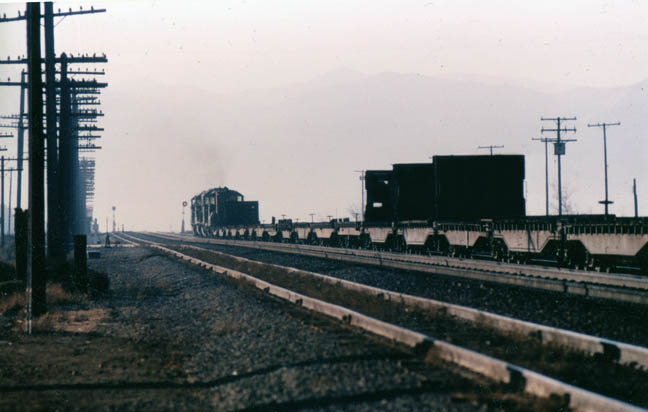
As the MUG train passed here at Monolith and later winded it way down the Tehachapi pass, I knew someday it would modeled on my layout.


